


How to activate and reset a card machine by myPOS
Tips / 20.06.2021
Congratulations! You’ve just purchased your very own myPOS device and you’re ready to accept payments! If you’re reading this, then you’ll want to know how to activate and reset your card machine by myPOS.
Luckily, the process is ultra-easy and super quick. Let’s get started!
Table of Contents
Activating your device
The process for activating your new card reader is practically the same for all myPOS devices, so we’ll share with you how to activate your myPOS Go device in a few easy steps.
- Switch on your device and make sure it’s connected to the Internet
- Log in to your myPOS account and go to Devices -> Activate device
- Fill in your device settings
- Set a billing descriptor and an outlet your device is linked to
- Review and confirm details
- Enter the confirmation code sent to your phone in your account and on your myPOS Go device and press “enter”
- The device will then automatically check for software updates and install them
The additional settings menus
For your convenience, all functions of the myPOS Go are divided into two groups: Transactions (F1) and Settings (F2).
These functions range from choosing your payment method to making a refund to resetting and pairing your device.
You can start from the home screen by pressing the red X button on your device.
1. Transactions Menu (F1)

The Transactions menu is organised in two screens. Transaction menu 1 shows the list of supported types of payment transactions on your device.
These include making a payment, doing a mobile top-up, sending a Payment Request, conducting a refund, last transaction void, and offering a GiftCard.
Transaction menu 2 shows the list of operations and functions related to payment transactions such as reconciliation reports, top-up reports, and GiftCard reports.
2. Settings Menu (F2)
The Settings menu offers three different screens, each with different functionality.
Settings Menu 1 shows the list of supported settings for your myPOS Go device. These include changing the device language, turning the sound of the device on/off, changing the connection type, checking the connections, checking for updates, and undertaking a transactions configuration from which you can switch to tipping mode, multi-operator mode, and turn on or off any reference numbers.
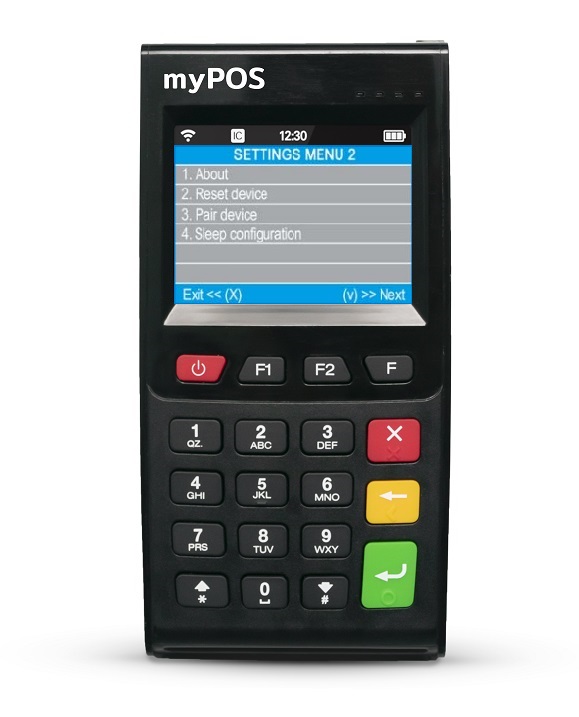
Settings menu 2 shows the second list of supported settings for your myPOS Go device including an “About” section, a section on how to reset your myPOS card payment machine, how to pair the device with another one, and sleep configuration.
When resetting your myPOS card reader machine, keep in mind that by doing so, you restore it to its factory settings. So do this only when you are sure this is the step you’d like to take.
Also important to note here is that when you choose this option, your device will no longer be linked to your myPOS account and you will need to return to the steps above in order to activate and re-link it to your account.
Settings menu 3 shows the third list of supported settings for your myPOS Go device, which includes the ability to send a device log to the myPOS Server. This is a function that our Customer Support team when troubleshooting, and if needed might request.
In closing…
Now that you know how to activate and reset your card machine, what are you waiting for?
Activating takes place in minutes and you’re all set to accept seamless payments. Welcome to the myPOS family!
